Managing digital assets within a crypto treasury across geographically dispersed teams can present significant challenges and consume valuable time.
Managing digital assets within a crypto treasury across geographically dispersed teams can present significant challenges and consume valuable time.
Coinshift's integration with WalletConnect streamlines this process, empowering treasury managers to conduct transactions using their preferred decentralised applications (dApps) directly from their secure digital vault.
How Coinshift users can interact with dApps through WalletConnect
As an example, we will show you how to create a transaction to provide liquidity on AAVE.
Step 1: Access Coinshift

Step 2: Connect With AAVE
To engage with Aave via Coinshift, visit
AAVE's landing page and click
Connect Wallet.
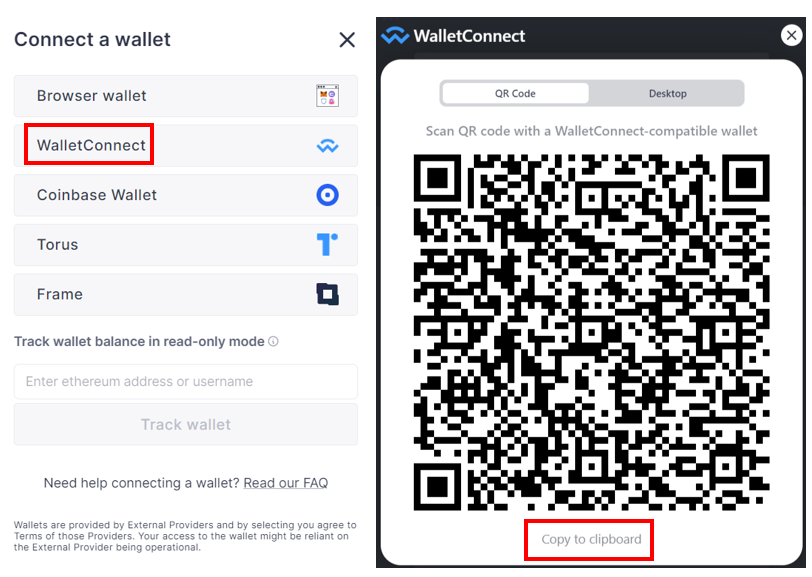
Select
WalletConnect
from the wallet types displayed.
The application will generate a QR code, copy the provided QR code and navigate back to your Coinshift dashboard.
Click on the
WalletConnect
option visible on your Coinshift dashboard, and enter the following relevant details:

- Select Safe (Safe address that you wish to transact from)
- WalletConnect QR Code (paste the QR address copied from AAVE)
and, click on Connect.
Shortly, you will observe a connection established with the AAVE protocol. Please note that this connection is exclusively configured for the current transaction and may be terminated at any time.
Step 3: Create a Transaction (Supply Into AAVE)
Transactions are initially created as proposals on Coinshift, enabling flexibility in approvals. Non-signers can create proposals, but only Signers can approve them.

To supply tokens to AAVE, visit AAVE's landing page and ensure your Safe is connected.
The interface conveniently displays your token options and balances available for deposit, allowing you the flexibility to choose any eligible token to make a deposit.
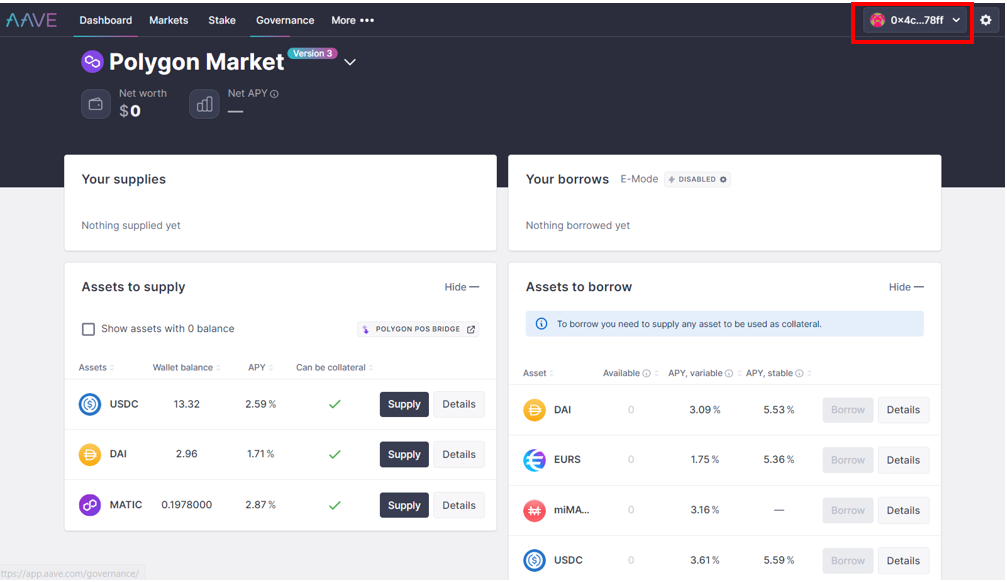
Click on the Supply button next to the token of your choice, and proceed to enter the deposit amount in the designated field.
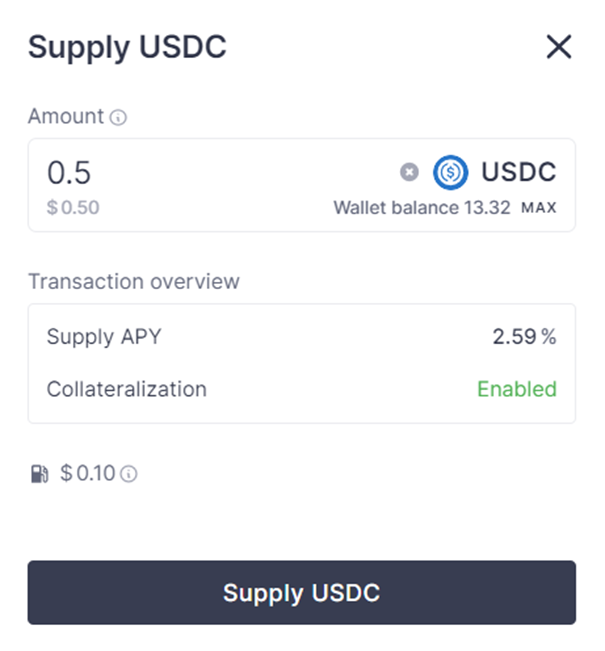
Click on the
Supply USDC
button, which will prompt a proposal on Coinshift. You can then proceed to add any necessary notes and labels, as desired.
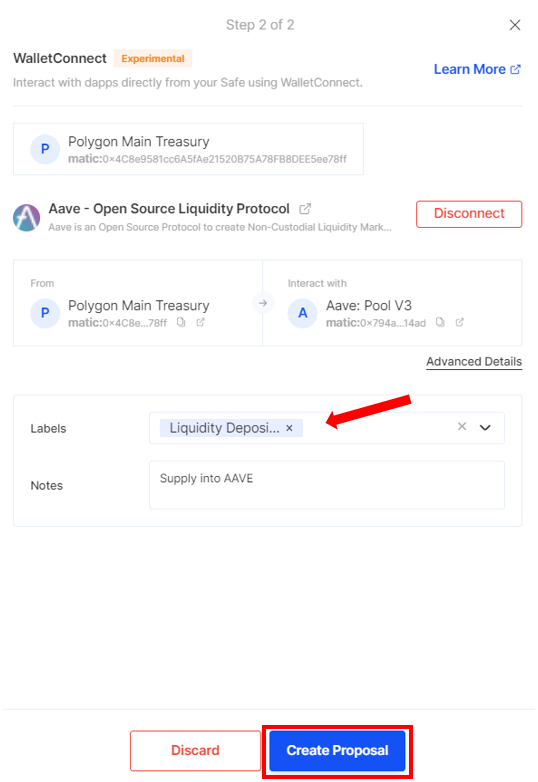
A proposal will be created for the designated Signers to either Approve or Discard as necessary.
Note that you can discard proposals without needing to pay any network fees.
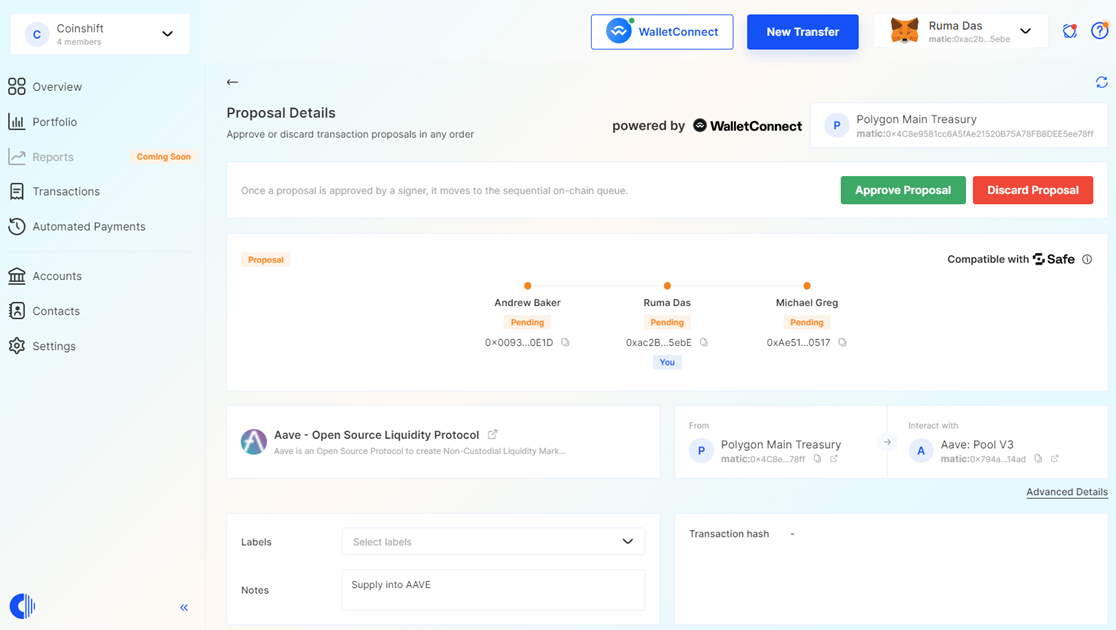
Step 4: Approve a Proposal
To execute a proposal, it must be approved by the required number of Signers. Click
Approve Proposal
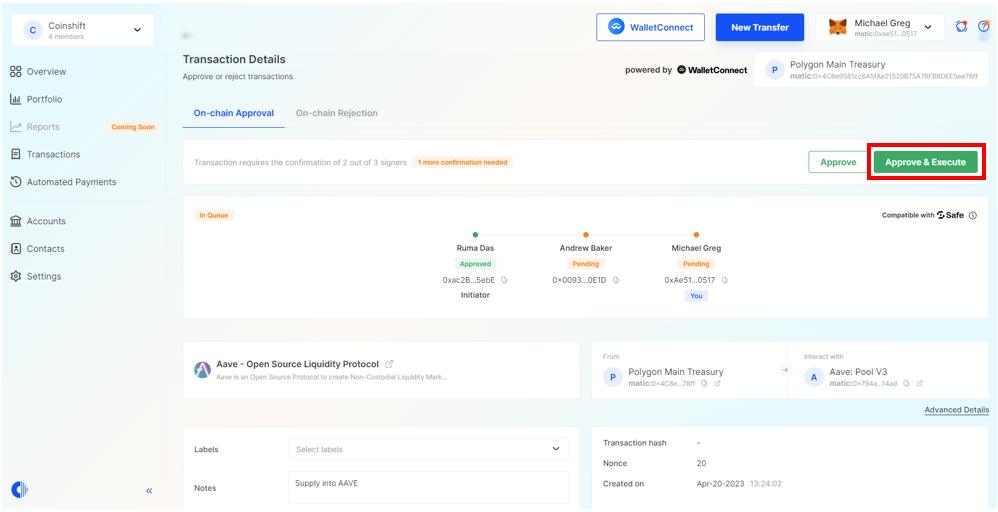
to initiate the approval process. The Coinshift dashboard will show the approval status of each Safe Signer.
The screenshot below indicates that the proposal was approved by the Initiator.
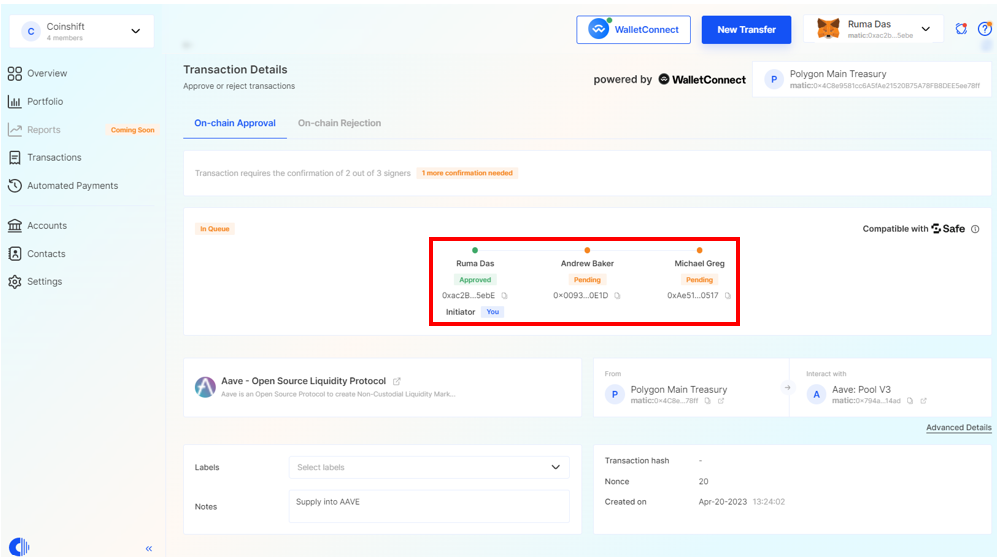
As the threshold for this Safe is set to two, the approval process only requires two Signers to approve the transaction. Once the proposal has been approved by the first Signer, the second Signer can proceed to Approve & Execute the transaction accordingly.
Upon the second Signer's approval and execution of the transaction, the approval workflow will reflect the second Signer as the Executor of the transaction.
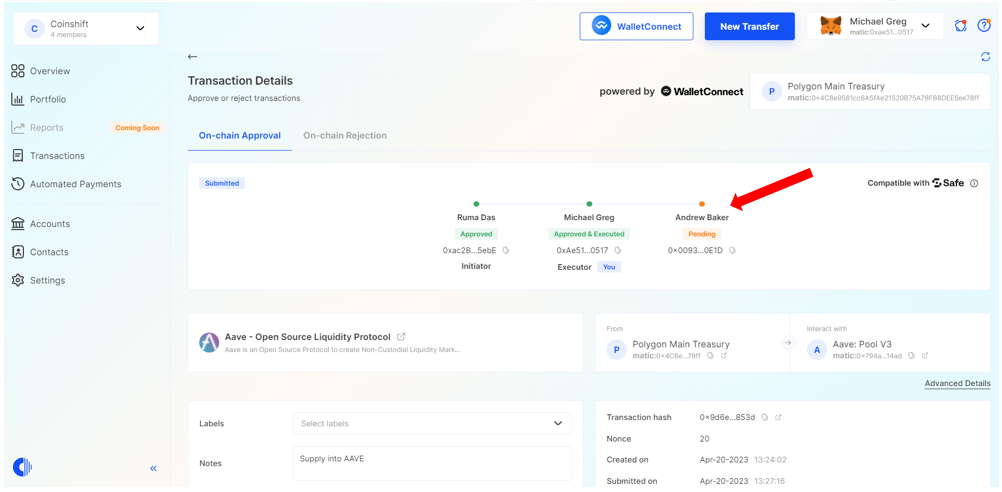
Congrats! You have successfully completed a Coinshift-AAVE transaction via WalletConnect. Your tokens have now been deposited into the platform, and you can review the relevant details on the AAVE dashboard.
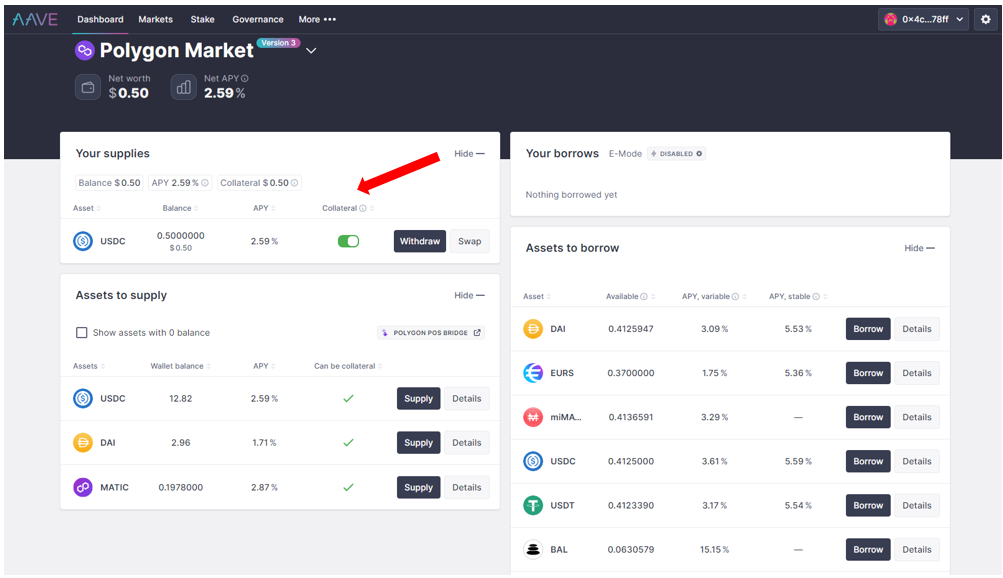
Note: Users can follow the same steps outlined previously to withdraw their assets from AAVE.
Useful links